Jas-39C Gripen from Revell in scale 1/32 (HuNAF)
- info9828577
- May 29, 2024
- 2 min read
Updated: May 29, 2024
Well, first of all, we would like to point out... It is not an average model because acceptable quality can only be achieved at the price of a lot of work. Revell launched this kit back in 1991. The basic set includes the Presentation type. So it's not version C. And since there are practically no conversion or improvement kits, a lot of manual work is necessary to achieve this result. Then let's get into it...
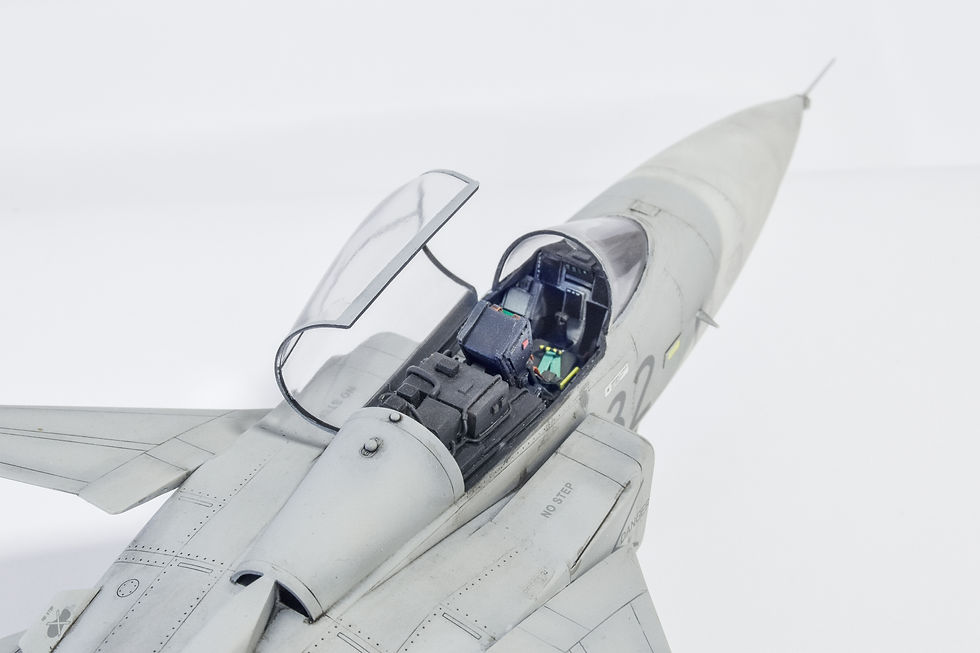
The set itself is not bad. Negative panel lines, relatively simple fittings are characterized by few shape parts and generally a good fit. This is not an adopted tool, but a completely Revell development. The sticker set is great, but since I didn't want to use it, I bought the decal set made by HAD. The first thing I had to change almost completely right away was the cockpit itself. The set includes the original version with a small display. That's why I rebuilt it using styrene sheets. The seat is acceptable, so I improved it with some tin wire and Tesa tape. Of course I had to remove the original belts first. I also made small switches and buttons out of styrene using pulled threads and the rivet punch tool from RP Toolz.
I used Gunze ester colors for the colors of the cockpit. And for the details (belts and switches) Revell oil paints. I like this combination because the evening spotless painting can be corrected later (can be washed back) easily with the help of white spirit and a thin 0/3 brush, since ester paints are definitely not dissolved by white spirit. You just have to pay attention to wait at least 24 but preferably 48 hours for drying, because oil paints dry more slowly. They dry faster or slower depending on how much we dilute them with white spirit. The thinner the mixture, the faster it dries. However, it covers less. That's why I prefer a slightly thicker mixture. Even if you have to wait 2 days.
Well, then came the more difficult part of the job... Fortunately, there is a lot of "walkaround" material on the net about the C version. Here I was faced with the fact of what I will have to transform. The main differences between version A and C are in the antennas of the electronic systems. Therefore, practically only they need to be transformed. Almost all of them are located in the vertical control plane. I replaced them with stretched fibers and Styrol sheets.

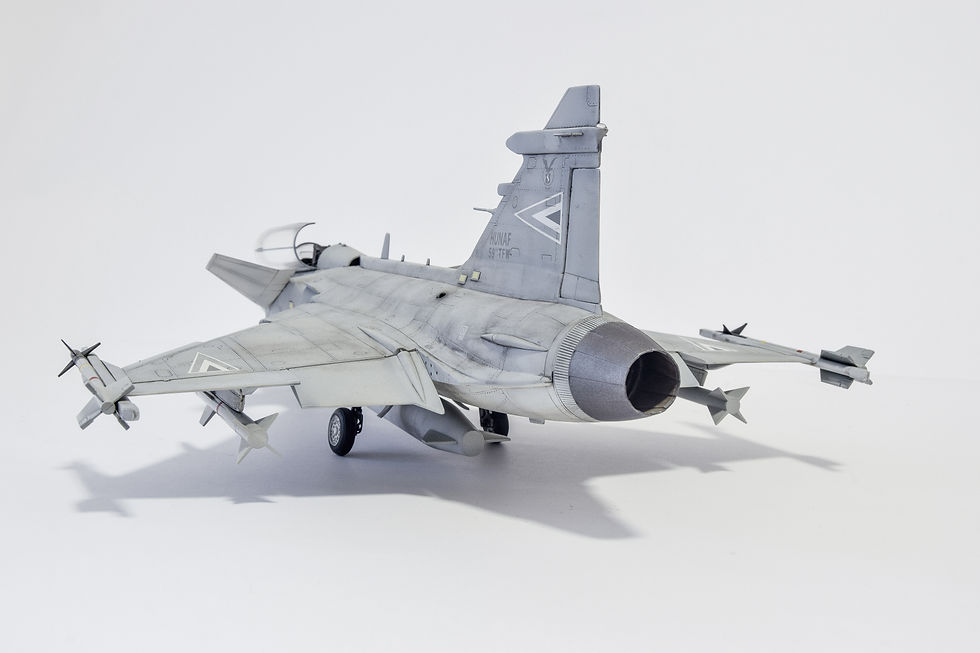
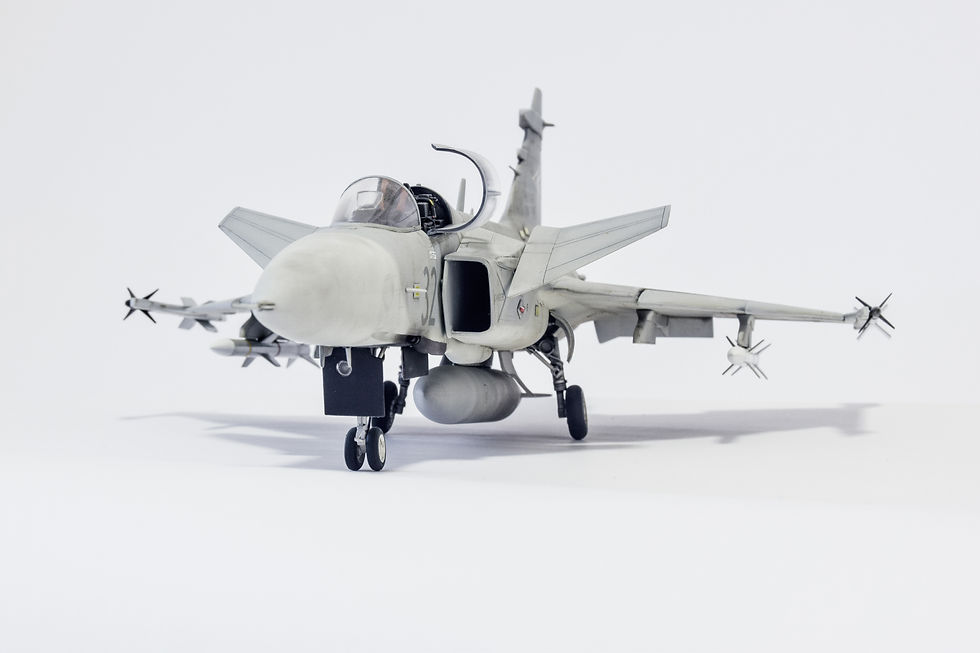
I then cut the elevator and brake vanes out of the wing so I could put them in the rest position. In the upper part of the trunk of the brake pads, I drilled out the trunk from both sides with a hand drill, and then made the armed part as well. I just uploaded 2 AIM 120 missiles and two AIM-9 sidewinders. I also used Gunze ester paints for the exterior painting. After more than 2 months of drilling, filing, sealing and sanding, the end result was perhaps acceptable. We will soon continue with more detailed material, where we will present the Revell EF 2000, documented in much more detail. If you want to know more about our products or current projects, follow us on Facebook browse our webshop Thanks!


Comentários